The Best Air Fryer French Toast Recipe +Video
https://fryit.co/air-fryer-french-toast-recipe/Elevate your breakfast game with this delectable Air Fryer French Toast recipe that boasts a crispy exterior and a creamy custard-like interior. 🤩 Fry it, to believe it!
Makes 2
Ingredients
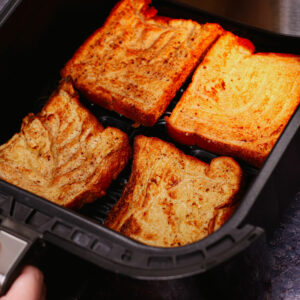
- 4 sllices bread
- 2 eggs
- ¼ cup milk
- 1 teaspoon sugar
- 1 tablespoon butter melted
- 1 tablespoon vanilla extract
- ½ teaspoon cinnamon powder
Optional Toppings
- Fresh berries
- Maple syrup
- Nuts
Instructions
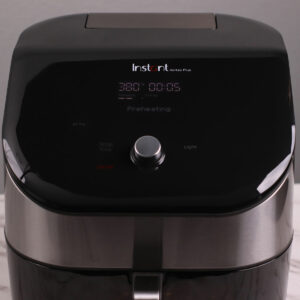
- Preheat the air fryer to 380°F (193°C).
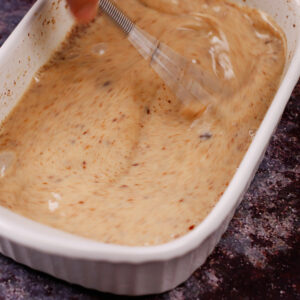
- In a shallow dish or a bowl prepare the custard mixture. Whisk together the eggs, milk, vanilla extract, ground cinnamon, sugar and melted butter until well combined.
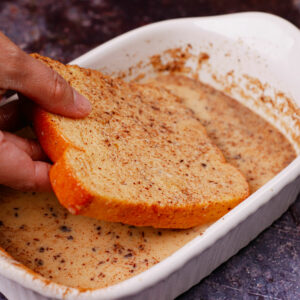
- Dip each slice of bread into the custard mixture and allow them to soak for a few seconds on each side, making sure they are fully coated with the mixture.
- Immediately after soaking your favorite slice of bread, air fry them for 3-4 minutes on each side until golden.
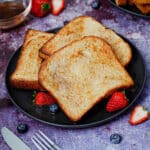
- Serve your air fried French toast with a drizzle of maple syrup and a side of berries and nuts. Enjoy!

Video
Notes
- If your air fryer doesn't have a preheating option, you can set the temperature to 380°F (193°C) and then let it cook for 4-5 minutes without food.
- You may also skip preheating by adding 2-3 minutes to your cooking time. However, be sure to check the toast constantly to prevent them from getting charred.
- Brioche bread will work best for making French toasts. However, for a cheaper and healthier option, you can substitute it with multi-grain or any other type of bread that is readily available.
- Pro Tip: Don't soak the bread slices in the egg mixture for too long, otherwise, it will become soggy. If possible, place them in the preheated air fryer right after soaking each bread slice.
- For even coating and convenience, choose a medium-sized baking dish or any container with a flat base for your custard mixture, allowing more room to dip your bread.
- I used a 6-quart Instant Pot Vortex Plus to test the air fryer French toast recipe. Cooking time and temperature may vary depending on your air fryer and the number of servings you are making. For optimal results, begin with the lower end of the suggested cooking time.
Nutrition
Calories: 165kcal | Carbohydrates: 6g | Protein: 7g | Fat: 11g | Saturated Fat: 6g | Polyunsaturated Fat: 1g | Monounsaturated Fat: 3g | Trans Fat: 0.2g | Cholesterol: 182mg | Sodium: 129mg | Potassium: 123mg | Fiber: 0.3g | Sugar: 5g | Vitamin A: 463IU | Vitamin C: 0.03mg | Calcium: 72mg | Iron: 1mg
Visit fryit.co for more easy & tasty air fryer recipes.